
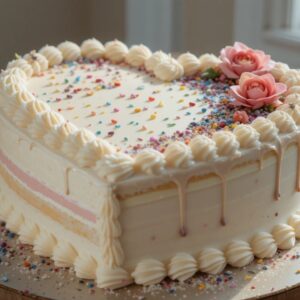
If you’re looking to create a dessert that’s as heartwarming as it is delicious, a heart-shaped cake is the perfect choice. Whether you’re celebrating a special occasion, like Valentine’s Day or an anniversary, or simply want to show someone you care, this cake is a great way to spread love through baking. With its soft layers, creamy frosting, and gorgeous shape, a heart cake makes any moment feel extra special.
The greatest part is that this recipe offers amazing versatility! You can customize it with your favorite flavors, frosting techniques, and even decoration to suit your taste and style. From rich chocolate to light vanilla, the possibilities are endless. Ready to get started? Let’s dive into this simple, step-by-step guide to making the best heart cake that will surely impress anyone you serve it to.
Table of Contents
What You’ll Need
Before we jump into the fun part of baking, let’s make sure you have everything you need to create your perfect heart cake. Don’t worry, it’s simple to gather – you likely have most of these ingredients in your kitchen already!
Ingredients:
- 2 cups all-purpose flour – This is the base of your cake, giving it structure and texture.
- 1 ½ teaspoons baking powder – This will help your cake rise beautifully!
- 1 cup unsalted butter, softened – Adds richness and moisture to the cake.
- 1 ½ cups granulated sugar – Sweetness that balances out the richness of the butter.
- 4 large eggs – These help bind everything together for a light, fluffy texture.
- 1 teaspoon vanilla extract – A touch of vanilla gives your cake a lovely, warm flavor.
- 1 cup whole milk – Helps keep the cake moist and soft.
- A pinch of salt – Just a pinch to balance the sweetness and enhance all the flavors.
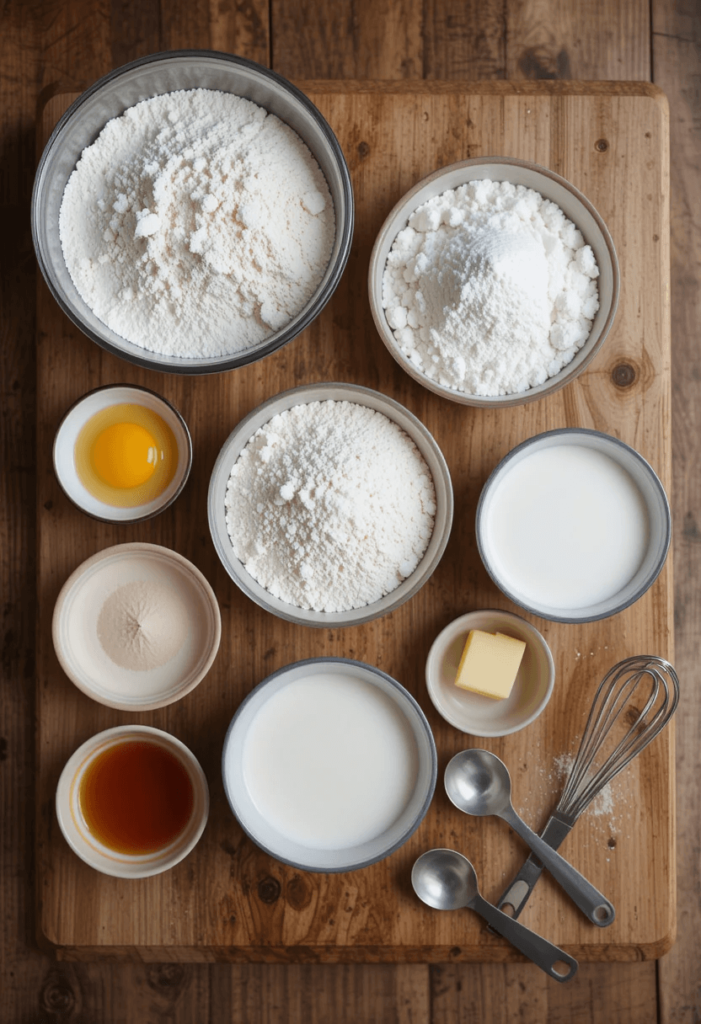
For the Frosting:
- 2 cups heavy whipping cream – The base for a smooth, creamy frosting.
- 1 ½ cups powdered sugar – Adds sweetness and helps the frosting hold its shape.
- 1 teaspoon vanilla extract – Boosts the frosting’s flavor.
Equipment:
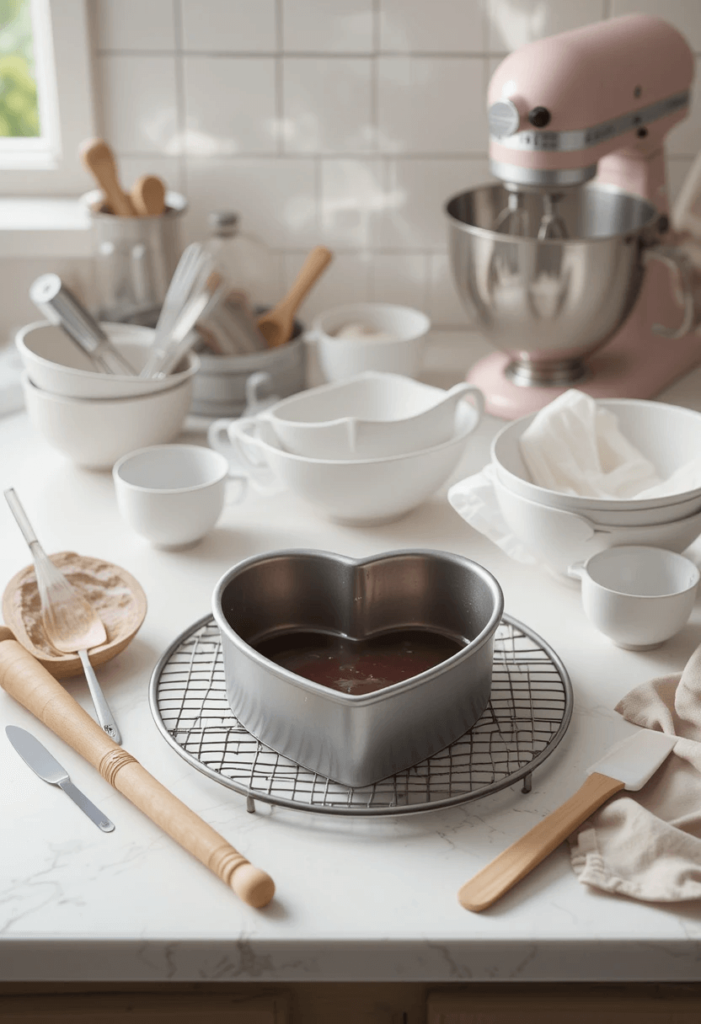
- Heart-shaped cake pan – The star of the show! If you don’t have one, a round or square pan will work, though you won’t get that signature heart shape.
- Mixing bowls – A couple of medium to large-sized bowls should be enough to mix the batter and frosting.
- Hand or stand mixer – To ensure your batter is smooth and fluffy.
- Cooling rack – To let your cake cool down properly before frosting.
- Spatula or piping bags – For spreading and decorating your frosting.
Once you’ve gathered all these ingredients, you’re ready to get started! Trust me, this cake will come together beautifully, and you’ll be amazed at how easy it is to make. Now, let’s move on to the next step—mixing everything together!
Step By Step Instructions
With everything prepared, let’s get started with the baking process! Follow these steps, and you’ll have a stunning heart-shaped cake that’s sure to impress.
1. Preheat Your Oven
Start by preheating your oven to 350°F (175°C). This ensures that the oven is hot and ready by the time your batter is ready to go in.
2. Prepare Your Cake Pan
Lightly grease your heart-shaped cake pan with butter or non-stick spray. Next, sprinkle a bit of flour to prevent the cake from sticking. Alternatively, you can line the bottom with parchment paper for extra ease when removing the cake.
3. Mix the Dry Ingredients
Add the flour, baking powder, and salt to a large bowl and mix well. Use a whisk to mix them together, ensuring everything is evenly distributed. This simple step helps to prevent any lumps in the batter and ensures a smooth, even rise.
4. Cream the Butter and Sugar
In a separate bowl, beat the butter and granulated sugar together with a hand or stand mixer on medium speed. Continue mixing until the butter is light and fluffy—this should take about 3-5 minutes. Creaming the butter and sugar helps to incorporate air, giving your cake that light, airy texture.
5. Add the Eggs
Then, incorporate the eggs one at a time, mixing thoroughly after each one. This helps the eggs incorporate smoothly into the batter, creating a uniform texture. Remember to scrape the sides of the bowl to make sure all ingredients are evenly incorporated.
6. Add Vanilla Extract
Stir in the vanilla extract. This will infuse the batter with a warm, aromatic flavor, making every bite of the cake delicious.
7. Alternate Adding Dry Ingredients and Milk
Begin adding your dry ingredients to the butter mixture in two parts. Start with a third of the dry mix, followed by half of the milk. Continue alternating between the dry ingredients and the milk, mixing just until incorporated after each addition. Be careful not to overmix—this will keep your cake light and tender!
8. Pour the Batter into the Pan
Once the batter is smooth and well-combined, carefully pour it into your prepared heart-shaped cake pan. Use a spatula to level the top and create an even layer.
9. Bake the Cake
Put the pan in the oven and bake for 25-30 minutes, or until a toothpick inserted into the center comes out clean. Keep an eye on it—every oven is different, so you may need a little extra time. When the cake is done, take it out of the oven and let it cool in the pan for 10 minutes. Once done, set it on a cooling rack to cool down completely.
10. Frost and Decorate
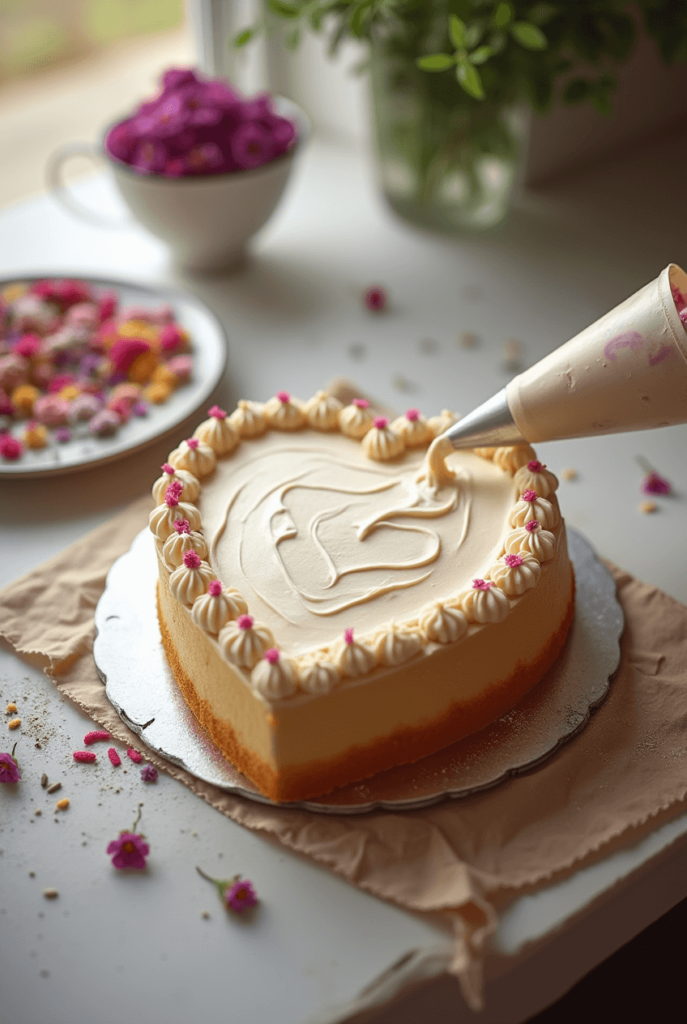
When the cake has cooled entirely, it’s time to frost! You can use a simple whipped cream frosting or your favorite buttercream. Spread the frosting evenly over the cake, using a spatula for a smooth finish or a piping bag for a decorative touch. Add any extra decorations you like, such as sprinkles, edible flowers, or a few heart-shaped toppers, to make your cake even more special.
And that’s it! You’ve just made a beautiful heart-shaped cake that’s ready to be enjoyed. Whether you’re serving it for a romantic celebration or a family get-together, it’s sure to be a showstopper. Keep reading for some helpful tips and tricks to ensure your cake is a total success!
Storage Instructions
Now that you’ve baked your heart cake and perhaps even indulged in a slice or two, let’s talk about how to store any leftovers (if there are any!). Proper storage will keep your cake fresh and delicious for longer.
Storing the Cake:
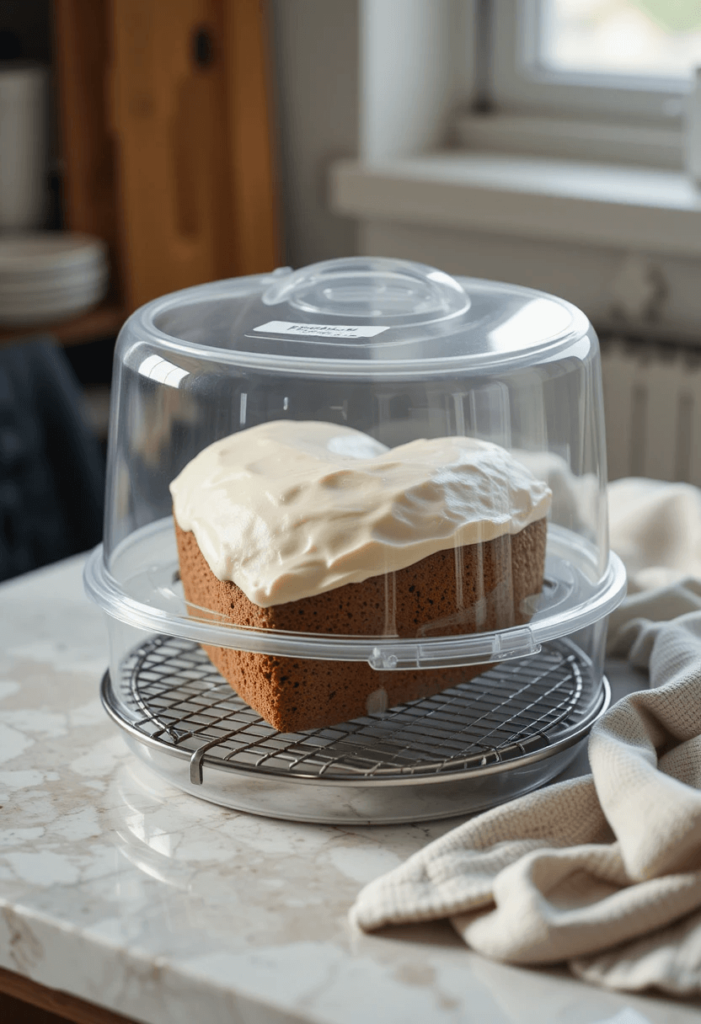
- Room Temperature: If you plan to eat your cake within 2-3 days, it can be stored at room temperature. Simply cover it with a cake dome or place it in an airtight container to prevent it from drying out. Keep it in a cool, dry area, out of direct sunlight and heat.
- Refrigeration: If you want to keep your heart cake for up to a week, refrigeration is your best option. Put it in an airtight container or seal it tightly with plastic wrap. The cooler temperature will help preserve the freshness of the frosting, especially if you’ve used whipped cream or buttercream.
Storing Slices:
- Individual Slices: If you’ve cut into the cake and have some leftover slices, you can store them individually. Individually wrap each slice in plastic wrap, and then store them in an airtight container. This keeps them fresh and makes it easy to grab a quick piece when you’re craving something sweet.
- Freezing the Cake: Want to save your cake for later? You can freeze your heart cake! Tightly wrap it in plastic wrap, then cover it with aluminum foil, and place it in the freezer. When you’re ready to enjoy it, just let it thaw at room temperature for a few hours. The cake will maintain its flavor and texture as if it were freshly made.
Frosting Considerations:
If you’ve used a delicate frosting like whipped cream, it’s best to store your cake in the refrigerator to maintain its texture. For buttercream or fondant decorations, the cake can stay at room temperature, but it’s still good to cover it to avoid it drying out.
By following these simple storage tips, you can enjoy your delicious heart cake for days to come, ensuring it stays as fresh and tasty as when you first made it!
With these storage instructions, your heart cake will stay just as delicious as when it was freshly baked. Feel free to indulge a little each day—or share it with friends and family!
Tips For Success
Ready to take your heart cake to the next level? Here are some professional tips to guarantee your cake turns out perfectly every time. Whether you’re a seasoned baker or a beginner, these simple tricks will help you achieve a flawless result.
1. Use Room Temperature Ingredients
Be sure your butter, eggs, and milk are at room temperature before mixing. Room temperature ingredients mix more smoothly, resulting in a better batter. This also helps create a fluffier texture in the finished cake.
2. Don’t Overmix the Batter
When you combine the dry ingredients with the wet ingredients, mix just until they’re incorporated. Overmixing can lead to a dense cake, which is definitely not what you want. A few lumps in the batter are okay—it’s the gentle mixing that makes the cake light and airy.
3. Check Your Oven Temperature
Ovens can vary in temperature, so it’s always a good idea to use an oven thermometer to ensure it’s at the correct temperature (350°F or 175°C). Baking at the right temperature helps the cake rise evenly and prevents it from being too dry or undercooked.
4. Use a Cake Tester
To make sure your cake is fully baked, insert a cake tester (or a toothpick) into the center. If it comes out clean, your cake is fully baked. If there’s batter stuck to it, give it a few more minutes in the oven. Don’t open the oven door too early—this can cause your cake to collapse.
5. Let the Cake Cool Completely
Patience is key when it comes to frosting. Allow your cake to cool completely on a cooling rack before adding the frosting. If you try to frost it while it’s still warm, the frosting will melt, and you won’t get that smooth, polished look.
6. Chill the Frosting (If Necessary)
If you’re using a buttercream frosting, refrigerate it for 15-20 minutes before spreading. This makes it firmer and easier to work with, especially if you’re piping designs or creating a smooth surface.
7. Get Creative with Decorations
While a simple frosted heart cake is beautiful on its own, don’t be afraid to get creative! Add a personal touch by decorating with edible flowers, sprinkles, or even a drizzle of chocolate. You can also use food coloring to make your frosting match your celebration’s theme—whether it’s red for Valentine’s Day or pastel shades for a spring event.
8. Make Ahead for Convenience
If you’re preparing for a big event, you can bake the cake and store it unfrosted for up to two days. Simply cover it tightly and store it at room temperature. Frost it right before serving for the freshest results.
Conclusion
Congratulations! You’ve just created a beautiful, heart-shaped cake that’s sure to steal the show. Whether it’s for a romantic celebration, a family gathering, or just because you feel like spreading a little love, this cake will make any occasion extra special. It’s not just a treat; it’s a meaningful gesture that shows you care.
Now, kick back and enjoy the rewards of your effort. Savor the soft, moist layers, the rich frosting, and the joy of having made something so delightful with your own hands. Remember, baking is all about having fun and experimenting with flavors and decorations, so don’t be afraid to put your unique twist on this recipe.
You’ve got this—every slice will be filled with love and sweetness, just like the occasion you’re celebrating. And if you decide to share, I’m sure everyone around the table will be impressed by your heart-shaped creation. Enjoy, and don’t forget to take lots of photos—you’ll want to remember this beautiful cake!
Happy baking!
———————–
Heart Cake
Ingredients
- 2 cups all-purpose flour – This is the base of your cake giving it structure and texture.
- 1 ½ teaspoons baking powder – This will help your cake rise beautifully!
- 1 cup unsalted butter softened – Adds richness and moisture to the cake.
- 1 ½ cups granulated sugar – Sweetness that balances out the richness of the butter.
- 4 large eggs – These help bind everything together for a light fluffy texture.
- 1 teaspoon vanilla extract – A touch of vanilla gives your cake a lovely warm flavor.
- 1 cup whole milk – Keeps the cake moist and tender.
- A pinch of salt – Just a pinch to balance the sweetness and enhance all the flavors.
- For the Frosting:
- 2 cups heavy whipping cream – The base for a smooth creamy frosting.
- 1 ½ cups powdered sugar – Adds sweetness and helps the frosting hold its shape.
- 1 teaspoon vanilla extract – Enhances the flavor of the frosting.
Instructions
Preheat Your Oven
- Start by preheating your oven to 350°F (175°C). This ensures that the oven is hot and ready by the time your batter is ready to go in.
Prepare Your Cake Pan
- Lightly grease your heart-shaped cake pan with butter or non-stick spray. Then, dust it with a little flour to ensure the cake doesn’t stick. Alternatively, you can line the bottom with parchment paper for extra ease when removing the cake.
Mix the Dry Ingredients
- In a large bowl, combine the flour, baking powder, and salt. Use a whisk to mix them together, ensuring everything is evenly distributed. This simple step helps to prevent any lumps in the batter and ensures a smooth, even rise.
Cream the Butter and Sugar
- In a separate bowl, beat the butter and granulated sugar together with a hand or stand mixer on medium speed. Continue mixing until the butter is light and fluffy—this should take about 3-5 minutes. Creaming the butter and sugar helps to incorporate air, giving your cake that light, airy texture.
Add the Eggs
- Now, add the eggs one at a time, beating well after each addition. This helps the eggs incorporate smoothly into the batter, creating a uniform texture. Don’t forget to scrape down the sides of the bowl to make sure everything is evenly mixed.
Add Vanilla Extract
- Stir in the vanilla extract. This will infuse the batter with a warm, aromatic flavor, making every bite of the cake delicious.
Alternate Adding Dry Ingredients and Milk
- Begin adding your dry ingredients to the butter mixture in two parts. Start with a third of the dry mix, followed by half of the milk. Continue alternating between the dry ingredients and the milk, mixing just until incorporated after each addition. Be careful not to overmix—this will keep your cake light and tender!
Pour the Batter into the Pan
- Once the batter is smooth and well-combined, carefully pour it into your prepared heart-shaped cake pan. Use a spatula to smooth the top and ensure an even layer.
Bake the Cake
- Place the pan in the oven and bake for 25-30 minutes, or until a toothpick inserted into the center comes out clean. Keep an eye on it—every oven is different, so you may need a little extra time. Once the cake is done, remove it from the oven and let it cool in the pan for 10 minutes. Then, transfer it to a cooling rack to finish cooling completely.
Frost and Decorate
- Once the cake has cooled completely, it’s time to frost! You can use a simple whipped cream frosting or your favorite buttercream. Spread the frosting evenly over the cake, using a spatula for a smooth finish or a piping bag for a decorative touch. Add any extra decorations you like, such as sprinkles, edible flowers, or a few heart-shaped toppers, to make your cake even more special.
Notes
Nutrition Information (Per Serving):
- Calories: 350 kcal
- Fat: 18g
- Saturated Fat: 10g
- Cholesterol: 50mg
- Sodium: 200mg
- Carbohydrates: 45g
- Fiber: 2g
- Sugar: 30g
- Protein: 4g
Recipe FAQs
Baking a heart-shaped cake for the first time can raise a few questions, and that’s completely normal! To help you get the best results and address any potential challenges, here are some frequently asked questions that may pop up during your cake-making journey.
1. Can I make this cake without a heart-shaped pan?
Absolutely! While a heart-shaped cake pan adds a fun, themed touch, you can use any pan you have on hand. Simply use a round or square cake pan instead, and you’ll still get a delicious cake. If you prefer the heart shape, you can even cut the cake into a heart shape using a template after it’s baked.
2. Can I make this cake gluten-free?
Yes, you can! To make this cake gluten-free, swap out the all-purpose flour for a good quality gluten-free flour blend. Just be sure to choose a flour that’s designed to mimic the texture of wheat flour to get the best results. You might also need to add a little extra baking powder to help with rising.
3. What type of frosting is ideal for a heart-shaped cake?
While buttercream and whipped cream frosting are popular choices for heart-shaped cakes, you can get creative! Cream cheese frosting adds a tangy flavor that pairs wonderfully with a sweet cake. For a smoother, more polished look, you can also use fondant—just remember it requires a bit more practice for perfect application.
4. How can I decorate my heart cake?
The sky’s the limit when it comes to decorating your heart cake! You can go classic with a smooth layer of frosting and a few sprinkles, or add a more personal touch with edible flowers, fondant decorations, or even a drizzle of chocolate ganache. If you’re feeling extra creative, you could pipe on roses, hearts, or any other design that fits the occasion!
5. Is it okay to make the cake in advance?
Definitely! You can bake the cake one or two days in advance. Just store the cooled cake in an airtight container at room temperature until you’re ready to frost it. If you need to freeze it, wrap it tightly in plastic wrap and aluminum foil and freeze for up to a month. Let it thaw at room temperature before frosting.
6. Why is my cake not rising properly?
If your cake isn’t rising the way you’d like, there are a couple of things to check. First, ensure your baking powder is fresh and hasn’t expired, as this can affect the rise. Also, make sure you’re not overmixing the batter, as this can lead to a dense cake. Lastly, don’t skip preheating the oven—baking at the right temperature is crucial.
7. Can I substitute a different flavor for the cake?
Of course! This heart cake recipe is incredibly versatile. You can swap out the vanilla for any flavor you prefer, like chocolate, lemon, or even coffee. You can also add ingredients like cocoa powder for a chocolatey version or zest from citrus fruits to add a refreshing twist.
8. How can I determine when the cake is finished baking?
To see if your cake is ready, insert a toothpick or cake tester into the center. If it comes out clean or with a couple of crumbs, your cake is ready. If the toothpick comes out with wet batter, it needs a little more time in the oven. Keep a close eye on the cake as it finishes baking to avoid overbaking.
2 thoughts on “How to Make the Best Heart Cake”
Comments are closed.