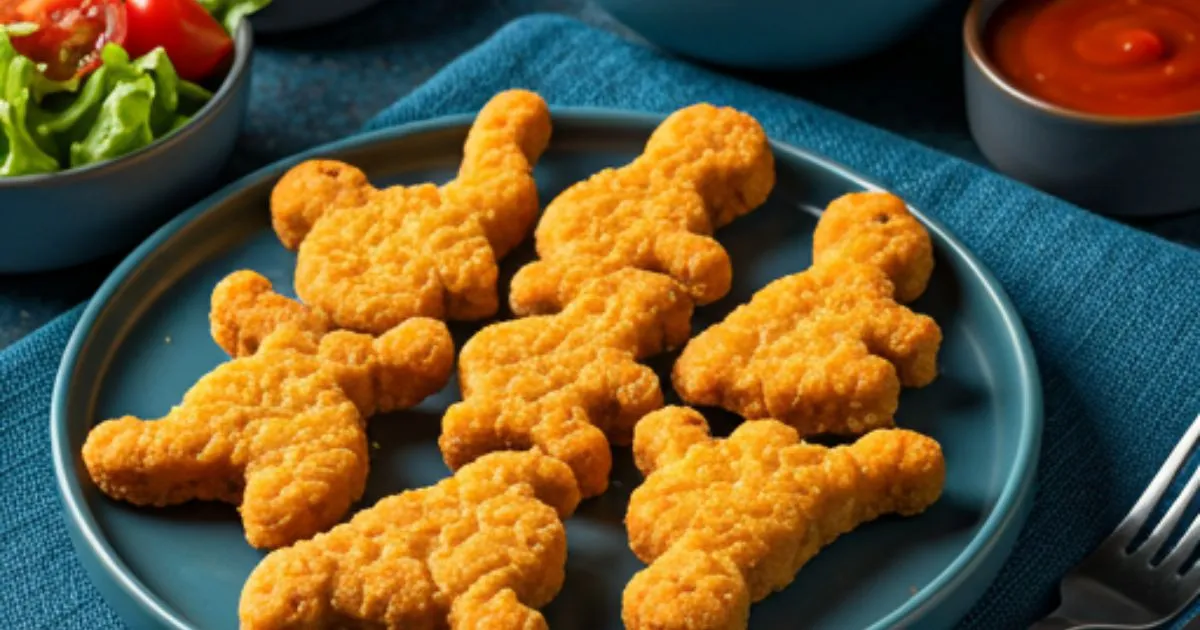
Who doesn’t love a crispy, golden chicken nugget? Especially when it’s shaped like a fun dinosaur! These homemade dino nuggets are a game-changer, offering a kid-friendly meal that’s both delicious and easy to make. Whether you’re cooking for your little ones or just craving a fun snack, this recipe is sure to impress. Imagine the joy on their faces when they bite into these perfectly crispy nuggets, made with simple ingredients like chicken breast, breadcrumbs, and a touch of Parmesan for that irresistible crunch.
What’s even better? You can easily customize the recipe to fit your family’s tastes or dietary needs. Want to make them a little healthier? Try swapping in whole wheat breadcrumbs or adding some extra spices for a flavor boost. Whether you fry them, bake them in the oven, or crisp them up in an air fryer, these dino nuggets will become your new go-to for family-friendly meals or quick snacks. Ready to get started? Let’s dive into how you can make these fun, homemade dino nuggets right at home!
Table of Contents
What You’ll Need
To make these fun and crispy dino nuggets at home, you don’t need much—just a few simple ingredients and tools! Whether you’re cooking for kids or craving a tasty snack yourself, this recipe is a breeze. Let’s dive into the essentials:
Ingredients:
- 2 boneless, skinless chicken breasts – The main star of the recipe! Fresh chicken breast is ideal for a lean, juicy bite, but chicken thighs work too if you prefer a bit more flavor and moisture.
- 1 cup breadcrumbs – Regular breadcrumbs are great, but for extra crunch, I recommend panko breadcrumbs. They create that irresistible crispy coating.
- ½ cup grated Parmesan cheese – This adds a nice, savory bite and helps the nuggets crisp up beautifully.
- 1 teaspoon garlic powder – A flavorful base that brings the seasoning to life.
- 1 teaspoon paprika – A mild, smoky touch that adds color and depth to the flavor.
- 2 large eggs – You’ll use these to help the coating stick to the chicken.
- 1 cup all-purpose flour – The first layer of coating before dipping in the egg and breadcrumbs.
- Salt and pepper – Always season your chicken for the best taste.
- Olive oil or vegetable oil – For frying the nuggets. If you’re using an air fryer for a healthier option, it’s still great to spray a little oil for that crispy texture.

Tools:
- Cutting board and sharp knife – For chopping the chicken into bite-sized pieces.
- 3 shallow bowls – One for the flour, one for the eggs, and one for the breadcrumb mixture.
- Frying pan or air fryer – A non-stick frying pan works perfectly for frying, but if you want to go healthier, an air fryer will still deliver crispy, golden nuggets with less oil.
- Tongs or slotted spoon – To carefully flip the nuggets and avoid messy hands.
- Paper towels – For draining the oil after frying, ensuring your nuggets stay crisp.
Quick Tip:
If you want an extra-crunchy texture, try letting the coated chicken pieces sit in the fridge for about 20 minutes before cooking. This helps the coating set and results in a crunchier exterior when fried or baked.
Now that we’ve got everything ready, you’re all set to start making these homemade dino nuggets. Time to dive into the fun part, are you ready? Let’s get cooking!
Recipe Substitutions & Additions
One of the best parts about making homemade dino nuggets is how flexible the recipe is. Whether you want to make these nuggets a bit healthier, cater to dietary preferences, or simply experiment with new flavors, there are tons of easy substitutions and additions to try. Let’s explore some options that will help you customize your dino nuggets to suit your tastes!
Ingredient Substitutions:
- Chicken Thighs Instead of Chicken Breasts: If you prefer a juicier, more flavorful nugget, swap out the chicken breasts for boneless, skinless chicken thighs. They’re slightly fattier, which makes them tender and extra moist.
- Gluten-Free Breadcrumbs: For those avoiding gluten, simply swap in gluten-free breadcrumbs or crushed gluten-free crackers. This will give you the same crispy exterior without any gluten.
- Almond Flour: Want a low-carb or keto-friendly option? Replace the all-purpose flour with almond flour. It works beautifully to create a crisp, golden coating while keeping the recipe grain-free.
- Nutritional Yeast: For a dairy-free alternative, try using nutritional yeast in place of Parmesan cheese. It will still give you that savory, cheesy flavor without any dairy.
- Ground Chicken or Turkey: You can also use ground chicken or ground turkey for a different texture. Just be sure to add some extra seasoning, as ground meat can be a bit milder.
Flavorful Additions:
- Spices: If you enjoy a little heat, adding cayenne pepper or chili powder to your breadcrumbs will give your nuggets a mild spice kick that’s balanced by the crispy coating.
- Fresh Herbs: Add dried oregano, thyme, or parsley to your breadcrumb mix for an extra burst of flavor. Fresh herbs elevate the overall taste and make your nuggets more aromatic.
- Cheese: For a cheesy twist, try mixing some shredded mozzarella or cheddar cheese into the breadcrumb mixture. The cheese will melt slightly when cooked, giving you a delicious gooey surprise in every bite.
- Lemon Zest: A little lemon zest adds a refreshing citrus note to the nuggets. Simply sprinkle it into the flour or breadcrumb mixture for a light, zesty finish.
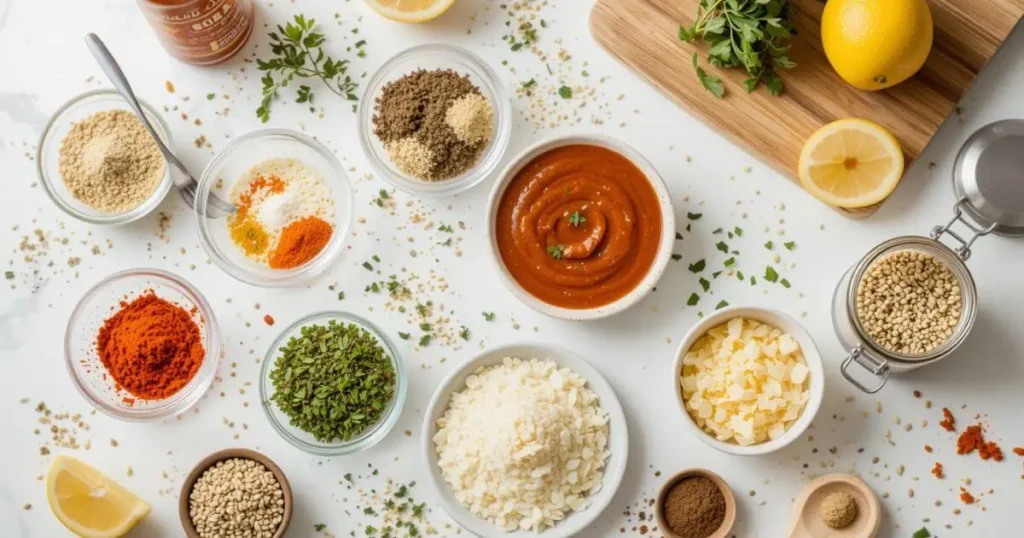
Fun Dipping Sauces:
The right dipping sauce can elevate your dino nuggets from tasty to irresistible! Here are a few ideas:
- Classic Honey Mustard: A mix of tangy mustard and sweet honey—kids love it!
- Creamy Ranch: A family favorite, perfect for dipping and adding that creamy richness.
- BBQ Sauce: If you like smoky flavors, BBQ sauce adds a wonderful depth of taste.
- Spicy Ketchup: Add a dash of Sriracha to ketchup for a spicy, flavorful twist that adults and older kids will love.
Quick Tip:
If you’re planning to make a larger batch, don’t hesitate to freeze your homemade dino nuggets before cooking. Simply arrange them on a baking sheet, freeze until solid, then store in a freezer-safe bag. You can cook them straight from frozen—just add a few extra minutes to the cooking time for perfectly crispy results.
There you have it—so many ways to customize your dino nuggets to suit your tastes and dietary needs. Ready to start cooking and create your perfect batch? Let’s move on to the next step!
Step-by-Step Instructions
Now that we’ve got all our ingredients and substitutions ready, it’s time to roll up our sleeves and start making these crispy, homemade dino nuggets. Don’t worry—this process is easy to follow, and I’m here to guide you every step of the way!
1. Prepare the Chicken
Start by rinsing your chicken breasts and patting them dry with a paper towel. This helps the breading stick better. Next, cut the chicken into bite-sized pieces. To make sure they cook evenly, try to keep the pieces about the same size. If you’re using chicken thighs, you can cut them into smaller chunks as well.
2. Set Up Your Dipping Stations
You’ll require three shallow bowls for this step:
- Bowl 1: Place the flour, a pinch of salt, and a pinch of pepper. Mix them together so everything is evenly distributed.
- Bowl 2: Crack the eggs into this bowl and whisk them until fully combined. You want a smooth, well-beaten egg mixture.
- Bowl 3: Combine your breadcrumbs, Parmesan cheese, garlic powder, and paprika in this final bowl. Mix well.
3. Coat the Chicken
This is where the magic happens! Take each chicken piece and coat it in the following order:
- Dredge the chicken in the flour mixture, making sure it’s fully covered.
- Immerse it in the egg mixture, letting any excess run off.
- Dredge it in the breadcrumb mixture, pressing slightly to make sure it sticks.
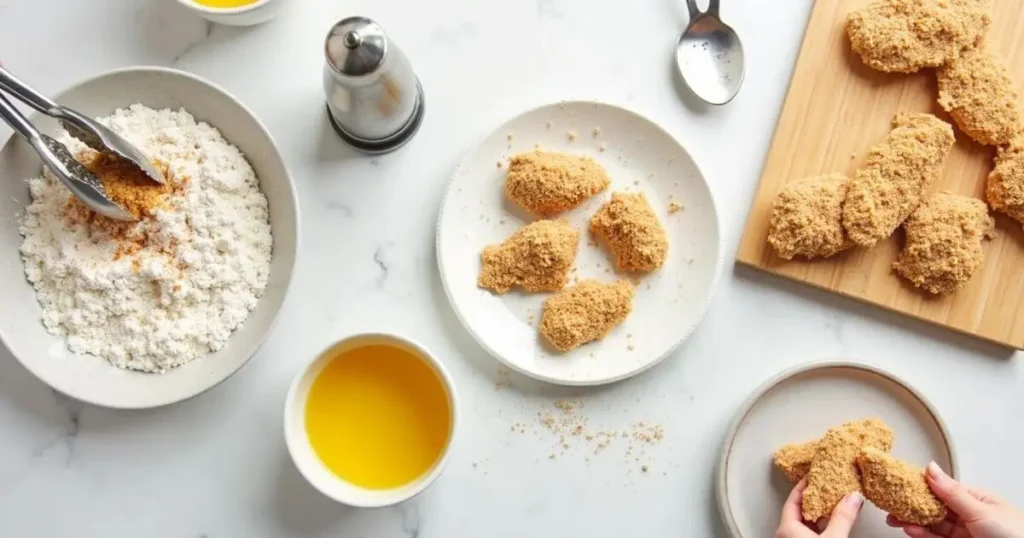
Repeat this process for all the chicken pieces. If you want an extra crispy coating, you can double-dip the chicken—just repeat the egg and breadcrumb steps.
4. Cook the Nuggets
Now it’s time to cook those nuggets to crispy perfection! You have a few options here:
- For frying: heat 1/4 inch of oil in a large skillet over medium-high heat. Once the oil is hot (you can test by dropping a breadcrumb in—it should sizzle), carefully add the chicken nuggets to the pan in batches. Don’t overcrowd the pan. Fry the nuggets for 3–4 minutes per side, or until golden brown and crispy.
- Baking: Preheat your oven to 400°F (200°C). Set the coated chicken pieces on a parchment paper-lined baking sheet. Bake for 15–20 minutes, flipping halfway through for even crispiness. If you want extra crunch, you can spray the nuggets lightly with oil before baking.
- Air Fryer: Heat your air fryer to 375°F (190°C). Position the nuggets in a single layer, with some space between them. Air fry for about 10–12 minutes, flipping halfway through, until they’re golden and crispy.
5. Drain and Serve
Once the nuggets are cooked, place them on a plate lined with paper towels to absorb any excess oil. Let them rest for a couple of minutes to cool down slightly and firm up the coating.
6. Enjoy!
Now the fun part—dipping! Serve your homemade dino nuggets with your favorite sauces and enjoy the crispy, juicy bite in every piece. Whether you’re serving them to kids or enjoying a nostalgic snack for yourself, these nuggets are sure to be a hit!

Quick Tip:
To keep the nuggets crispy if you’re serving them later, you can place them on a wire rack over a baking sheet and pop them in the oven at 200°F (90°C) for about 10–15 minutes before serving.
Making homemade dino nuggets is easy, fun, and customizable to your taste. With this simple step-by-step guide, you’ll be able to create a batch that’s crispy on the outside and tender on the inside. Ready to dig in?
Storage Instructions
If you’ve made a big batch of homemade dino nuggets or just want to prepare them in advance for a busy day, storing them properly is key to keeping them fresh and crispy. Whether you plan to eat them right away or save them for later, here’s how to store your nuggets to maintain their flavor and texture.
Storing Cooked Dino Nuggets:
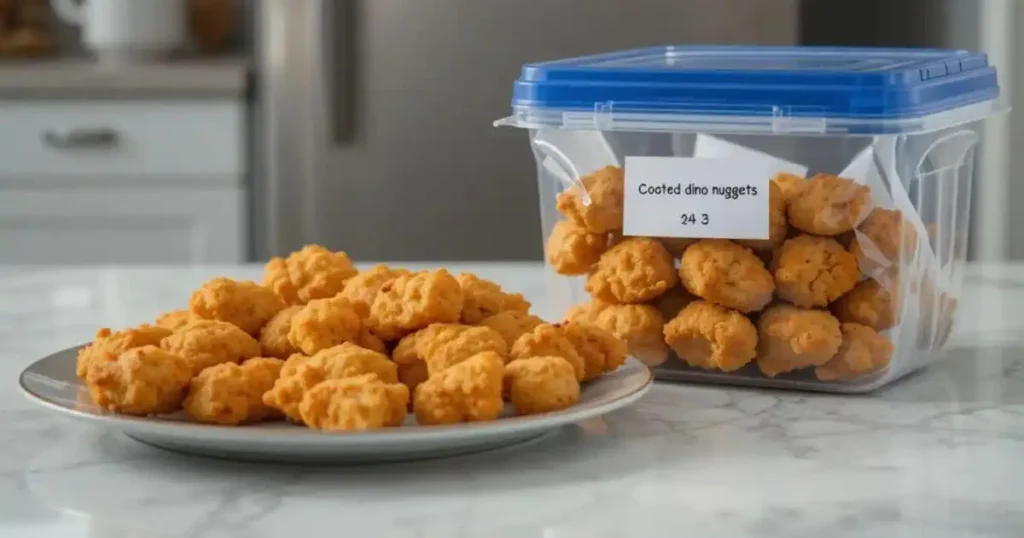
- Refrigeration: After your dino nuggets have cooled down completely, store them in an airtight container or a resealable bag. This will help lock in their freshness for up to 3 days in the fridge. Be sure to place a paper towel at the bottom of the container to absorb any moisture and keep the coating crispy.
- Freezing: To keep your homemade nuggets for even longer, freezing is a great option. First, arrange the cooked nuggets in a single layer on a baking sheet. Place the sheet in the freezer for 1–2 hours until the nuggets are solid. Then, transfer the frozen nuggets to a freezer-safe bag or container. They remain fresh for up to 3 months in the freezer. When you’re ready to eat them, simply reheat as needed.
Reheating Tips:
- Oven or Air Fryer: For the best results when reheating, bake or air fry your leftover nuggets to restore that crispy coating. Preheat your oven to 375°F (190°C), place the nuggets on a baking sheet, and bake for about 10–12 minutes until they’re heated through and crispy again. If you’re using an air fryer, air fry at 375°F (190°C) for 5–7 minutes.
- Microwave: While it’s not ideal for keeping the nuggets crispy, the microwave is the quickest way to reheat. Place the nuggets on a microwave-safe plate lined with a paper towel and microwave for 30–60 seconds, depending on your microwave’s wattage. Keep in mind, the texture will be softer than when they’re freshly made.
Quick Tip:
If you’re reheating from frozen, there’s no need to thaw them first. Just increase the cooking time by a few minutes when baking or air frying. This will help ensure the nuggets are heated through and still crisp on the outside.
Storing Uncooked Nuggets:
If you want to prepare the dino nuggets ahead of time and cook them later, that’s a great option too! After coating the chicken pieces, place them on a baking sheet in a single layer and freeze them. Once frozen, transfer the uncooked nuggets into a freezer-safe bag or container. They’ll stay good in the freezer for as long as 2 months. To cook, just fry, bake, or air fry straight from frozen—no need to thaw them out.
Storing your homemade dino nuggets properly ensures you can enjoy them on your own time while keeping them just as tasty as when they were first made. Whether you’re making them in advance for a busy week or saving leftovers, these storage tips will help keep your nuggets fresh and ready to eat!
Tips for Success
Making homemade dino nuggets is a fun and satisfying experience, but there are a few helpful tips and tricks that can take your nuggets from good to great! Whether you’re a beginner or a seasoned cook, these little pointers will ensure your dino nuggets turn out crispy, juicy, and full of flavor every time.
1. Pat Dry the Chicken
Before you start breading, make sure the chicken pieces are dry. This simple step helps the coating adhere better and results in a crispier texture. Use paper towels to gently pat the chicken dry after rinsing it.
2. Don’t Overcrowd the Pan
When frying the nuggets, be sure not to overcrowd the pan. This allows each nugget to cook evenly, achieving that perfect golden-brown crunch. If you’re making a large batch, fry them in batches to avoid overcrowding. Overcrowding can cause the nuggets to steam rather than fry, making them less crispy.
3. Use Fresh Breadcrumbs
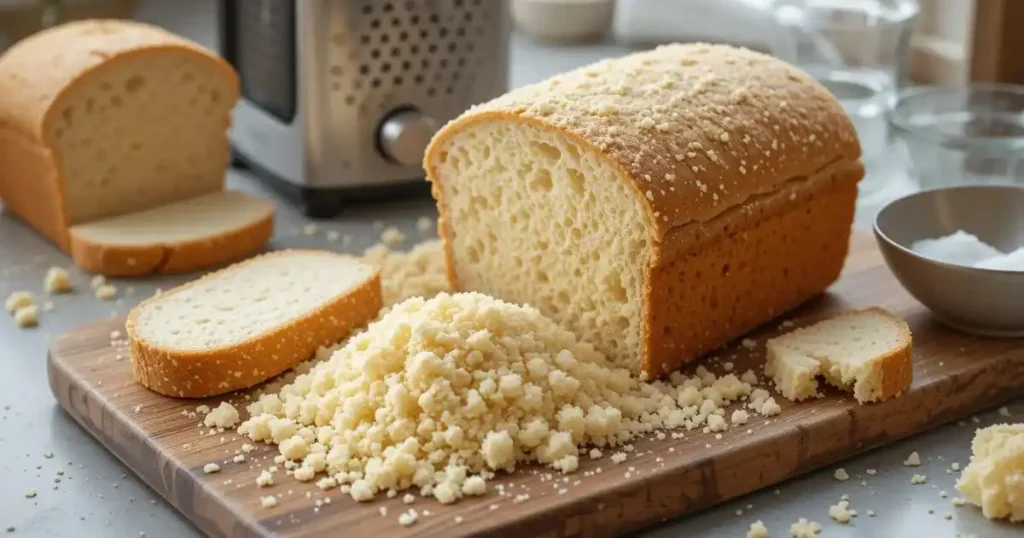
For the crispiest coating, try to use fresh breadcrumbs instead of pre-packaged ones. You can easily make fresh breadcrumbs by pulsing some day-old bread in a food processor. Fresh breadcrumbs provide a lighter, airier crunch, making your nuggets even more delicious.
4. Season Every Layer
Season every step of the coating process! Add a pinch of salt, pepper, and garlic powder to the flour, egg mixture, and breadcrumbs. Layering the seasoning ensures each bite is packed with flavor, so don’t skip this crucial step.
5. Don’t Skip the Resting Time
After breading the chicken, allow it to rest for 10-15 minutes before frying or baking. This helps the breading set, making it less likely to fall off during cooking. Plus, it lets the chicken pieces firm up, resulting in a better texture when cooked.
6. Get the Oil Hot Enough
If you’re frying the nuggets, make sure your oil is hot enough before you add the chicken. If the oil is too cool, the nuggets will absorb excess oil and become greasy. A good way to check the oil is by dropping a small piece of breadcrumb in—it should sizzle right away. Aim for around 350°F (175°C) for perfect frying.
7. Crisp in the Oven (If Baking)
If you’re baking your nuggets, try lightly spraying the breaded chicken with cooking spray or olive oil to help achieve that crispy finish. The oil helps the breadcrumbs brown beautifully while keeping the nuggets juicy on the inside.
8. Serve Immediately for Maximum Crunch
The best time to enjoy these homemade dino nuggets is right when they come out of the oven or fryer. The longer they sit, the softer the coating can become. Serve them hot with your favorite dipping sauces for the ultimate snack experience!
9. Freezing for Future Meals
As mentioned before, you can freeze uncooked breaded nuggets for a quick meal later. But don’t forget—when you freeze them, make sure they’re arranged in a single layer on a baking sheet first. This way, they don’t stick together, and you can cook them straight from the freezer whenever you need a quick meal.
Conclusion
Homemade dino nuggets are a fun, easy, and delicious meal that the whole family will love. With just a few simple ingredients and some basic cooking techniques, you can make crispy, flavorful chicken nuggets right at home. Whether you’re frying, baking, or experimenting with different breading options, the possibilities are endless. Plus, with the tips and variations we’ve shared, you can customize your nuggets to suit any dietary preference or craving.
Don’t forget, the world of chicken recipes is vast and exciting, so after making your dino nuggets, be sure to explore other tasty options like crispy chicken tenders, chicken Parmesan, or BBQ chicken sliders to keep your meals fresh and exciting. Whether you’re cooking for a crowd or preparing a quick dinner for the family, chicken is always a great choice.
So, gather your ingredients, get cooking, and enjoy these homemade dino nuggets alongside other chicken dishes that will have everyone asking for seconds! Happy cooking!
—————
How to make dino nuggets at home
Ingredients
- 2 boneless skinless chicken breasts – The main star of the recipe! Fresh chicken breast is ideal for a lean, juicy bite, but chicken thighs work too if you prefer a bit more flavor and moisture.
- 1 cup breadcrumbs – Regular breadcrumbs are great but for extra crunch, I recommend panko breadcrumbs. They create that irresistible crispy coating.
- ½ cup grated Parmesan cheese – This adds a nice savory bite and helps the nuggets crisp up beautifully.
- 1 teaspoon garlic powder – A flavorful base that brings the seasoning to life.
- 1 teaspoon paprika – A mild smoky touch that adds color and depth to the flavor.
- 2 large eggs – You’ll use these to help the coating stick to the chicken.
- 1 cup all-purpose flour – The first layer of coating before dipping in the egg and breadcrumbs.
- Salt and pepper – Always season your chicken for the best taste.
- Olive oil or vegetable oil – For frying the nuggets. If you’re using an air fryer for a healthier option it’s still great to spray a little oil for that crispy texture.
Instructions
Prepare the Chicken
- Start by rinsing your chicken breasts and patting them dry with a paper towel. This helps the breading stick better. Next, cut the chicken into bite-sized pieces. To make sure they cook evenly, try to keep the pieces about the same size. If you’re using chicken thighs, you can cut them into smaller chunks as well.
Set Up Your Dipping Stations
- You’ll require three shallow bowls for this step:
- Bowl 1: Place the flour, a pinch of salt, and a pinch of pepper. Mix them together so everything is evenly distributed.
- Bowl 2: Crack the eggs into this bowl and whisk them until fully combined. You want a smooth, well-beaten egg mixture.
- Bowl 3: Combine your breadcrumbs, Parmesan cheese, garlic powder, and paprika in this final bowl. Mix well.
Coat the Chicken
- This is where the magic happens! Take each chicken piece and coat it in the following order:
- Dredge the chicken in the flour mixture, making sure it’s fully covered.
- Immerse it in the egg mixture, letting any excess run off.
- Dredge it in the breadcrumb mixture, pressing slightly to make sure it sticks.
- Fun Dipping Stations with Sauces for Homemade Dino Nuggets
- Repeat this process for all the chicken pieces. If you want an extra crispy coating, you can double-dip the chicken—just repeat the egg and breadcrumb steps.
Cook the Nuggets
- Now it’s time to cook those nuggets to crispy perfection! You have a few options here:
- For frying: heat 1/4 inch of oil in a large skillet over medium-high heat. Once the oil is hot (you can test by dropping a breadcrumb in—it should sizzle), carefully add the chicken nuggets to the pan in batches. Don’t overcrowd the pan. Fry the nuggets for 3–4 minutes per side, or until golden brown and crispy.
- Baking: Preheat your oven to 400°F (200°C). Set the coated chicken pieces on a parchment paper-lined baking sheet. Bake for 15–20 minutes, flipping halfway through for even crispiness. If you want extra crunch, you can spray the nuggets lightly with oil before baking.
- Air Fryer: Heat your air fryer to 375°F (190°C). Position the nuggets in a single layer, with some space between them. Air fry for about 10–12 minutes, flipping halfway through, until they’re golden and crispy.
Drain and Serve
- Once the nuggets are cooked, place them on a plate lined with paper towels to absorb any excess oil. Let them rest for a couple of minutes to cool down slightly and firm up the coating.
Enjoy!
- Now the fun part—dipping! Serve your homemade dino nuggets with your favorite sauces and enjoy the crispy, juicy bite in every piece. Whether you’re serving them to kids or enjoying a nostalgic snack for yourself, these nuggets are sure to be a hit!
Notes
- Calories: 350 kcal
- Fat: 18g
- Saturated Fat: 3g
- Trans Fat: 0g
- Carbohydrates: 28g
- Fiber: 2g
- Sugar: 3g
- Protein: 22g
- Cholesterol: 55mg
- Sodium: 600mg
- Potassium: 400mg
- Calcium: 30mg
- Iron: 2mg
Recipe FAQs
Have questions about making homemade dino nuggets? You’re not alone! Here are some of the most common queries to help you out, whether you’re new to cooking or looking for extra tips. Let’s dive into these helpful answers.
Are chicken thighs a good alternative to chicken breasts?
Absolutely! Chicken thighs can be a great substitute if you prefer darker meat. They are often juicier and packed with more flavor. Just be sure to cut them into bite-sized pieces like you would with chicken breasts. The cooking time might be slightly longer, so check for doneness by ensuring the internal temperature reaches 165°F (75°C).
How do I make these nuggets gluten-free?
Making gluten-free dino nuggets is simple! Instead of using all-purpose flour and regular breadcrumbs, swap in gluten-free flour and gluten-free breadcrumbs. Many gluten-free options are available in most supermarkets, and they’ll provide the same crispy coating without the gluten. You can also use almond flour for an added crunch!
Can I bake the nuggets without frying them?
Yes! Baking is a great alternative to frying. To get crispy results, preheat your oven to 400°F (200°C) and arrange the breaded nuggets on a parchment-lined baking sheet. Lightly spray them with olive oil or cooking spray to enhance the crispiness. Bake for 15-20 minutes, flipping halfway through, until golden and crunchy.
Can I freeze uncooked nuggets?
Definitely! Freezing uncooked dino nuggets is a great option for meal prep. After breading the chicken, place it in a single layer on a baking sheet and freeze until solid. Then, store them in a freezer-safe bag or container. When you’re ready to cook, you can fry, bake, or air fry them directly from frozen—just add a few extra minutes to the cooking time.
What are some good dipping sauces for dino nuggets?
Dipping sauces can really take your dino nuggets to the next level. Here are some popular options to try:
Honey mustard: A sweet and tangy classic.
Barbecue sauce: Perfect for a smoky flavor.
Ranch dressing: For a creamy and cool dip.
Buffalo sauce: If you like a little heat. Feel free to get creative with your own favorite sauces!

1 thought on “Homemade Dino Nuggets That Kids Will Love Every Time”
Comments are closed.